Quickstart
Getting set up to use Sundeck takes just a couple of minutes, and can be done in just 3 steps:
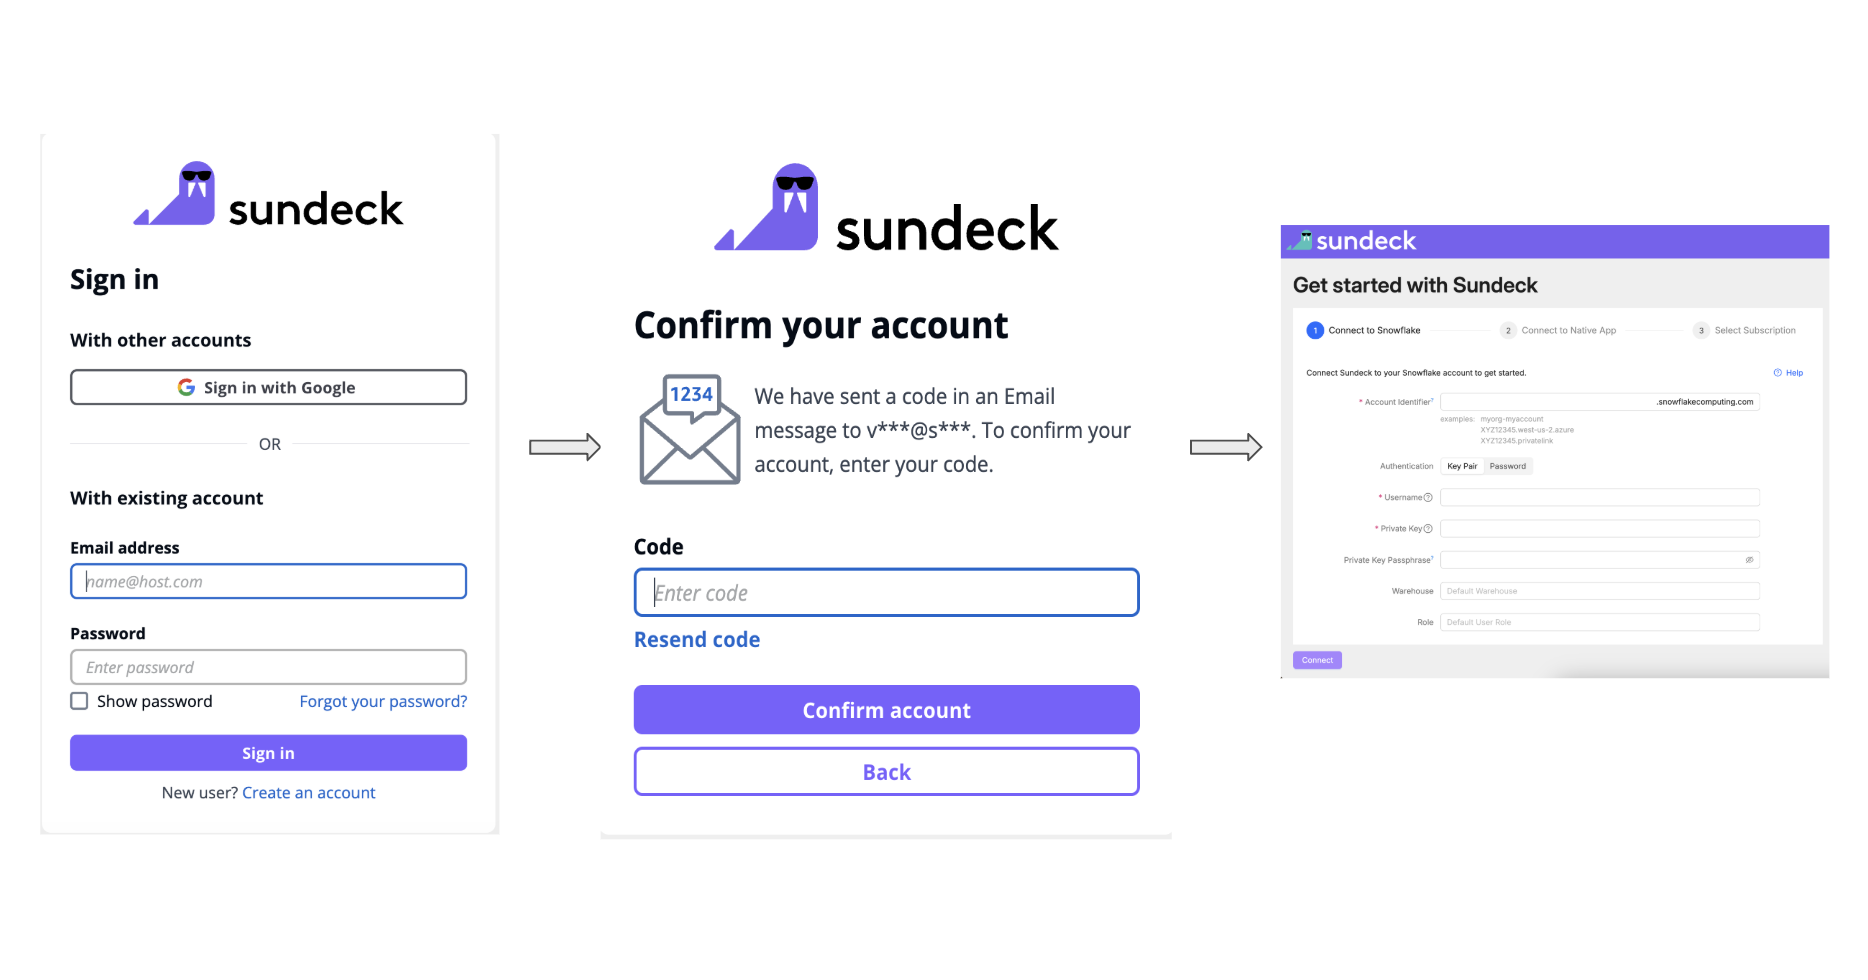
- Sign up for Sundeck with Google SSO or your email & password, and your Snowflake account.
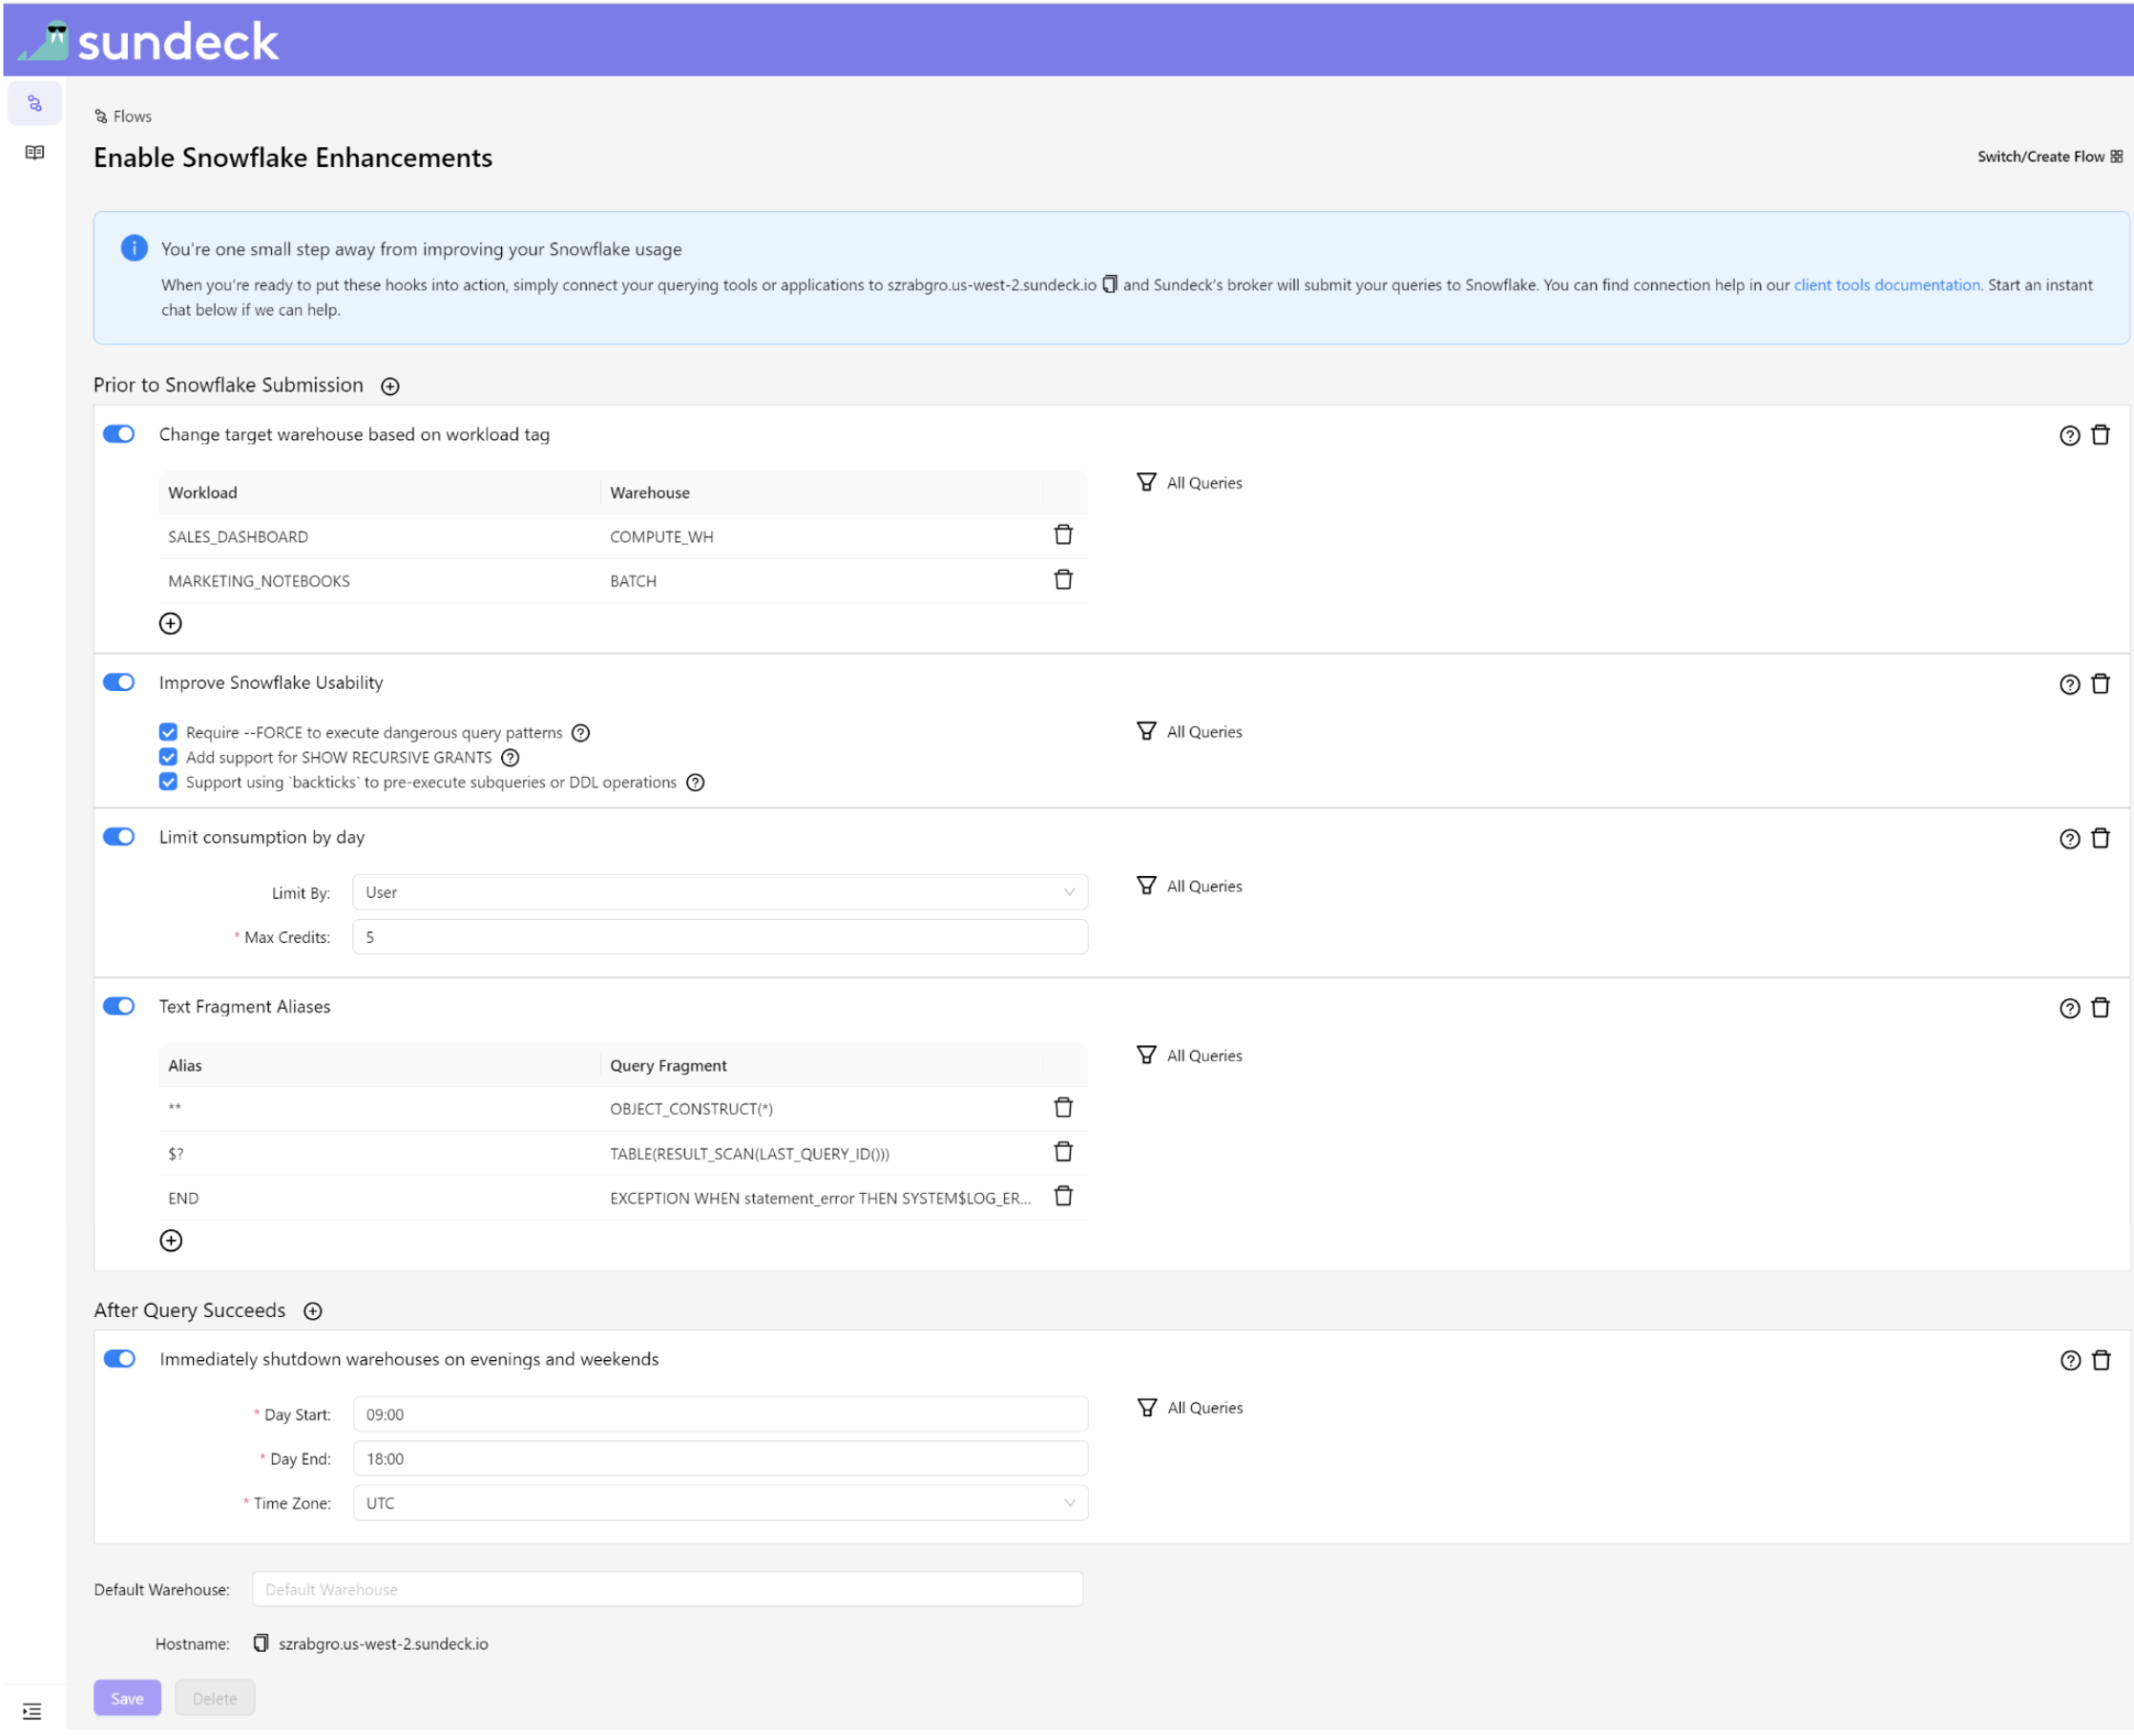
- Check the Default settings that Sundeck provides out-of-the-box to improve your Snowflake experience, and make any desired tweaks
- Connect your SQL Tools to your Sundeck Broker to start leveraging the power of Sundeck
To sign up for Sundeck, visit https://sundeck.io/sign-up and provide just a couple of pieces of information:

Sundeck comes pre-configured with a powerful set of Snowflake enhancements, which are available for immediate use with minimal configuration. Once your account has been created, you will be taken to your Broker configuration page, and can make any adjustments you wish to the predefined rules:

Scroll to the bottom of the page and click the “Save” button to save any changes to the default configuration, and note the Hostname property at the bottom of the page. Be sure to copy this hostname, as you will provide it to your SQL and BI tools to route queries through Sundeck in the next step.
You’ll need to connect your SQL Tools to Sundeck to start leveraging the power of Sundeck’s Flows and Hooks. In most cases, this is as simple as editing an existing connection or data source in your tool, and replacing your existing Snowflake URL with your Sundeck Flow address. We’ve put together a set of step-by-step instructions for connecting a number of popular SQL and BI tools. If yours is not on the list, feel free to reach out via the chat icon below, and we’ll be happy to lend a hand!
