Sigma
Configuring Sigma to connect with a Flow address on Sundeck involves creating a new Connection (or modifying an existing Connection) in the Sigma admin menu, using the “Proxy” option and providing the Flow address as the hostname.
You’ll need the following before setting up a connection:
- Permissions to access the Admin menu in Sigma (Sigma Connections are an Admin-only function).
- A configured Broker in Sundeck
- Snowflake Account Locator, desired default Warehouse, and Role to connect with
- Authentication credentials for Snowflake. This is true whether creating a new connection, or editing an existing one – Sigma clears the Snowflake password when a connection is edited, and this will need to be re-entered.
Obtain the Sundeck Broker Hostname
Log into the Sundeck Web UI
Navigate to the Broker > Config page (using the left-hand menu):
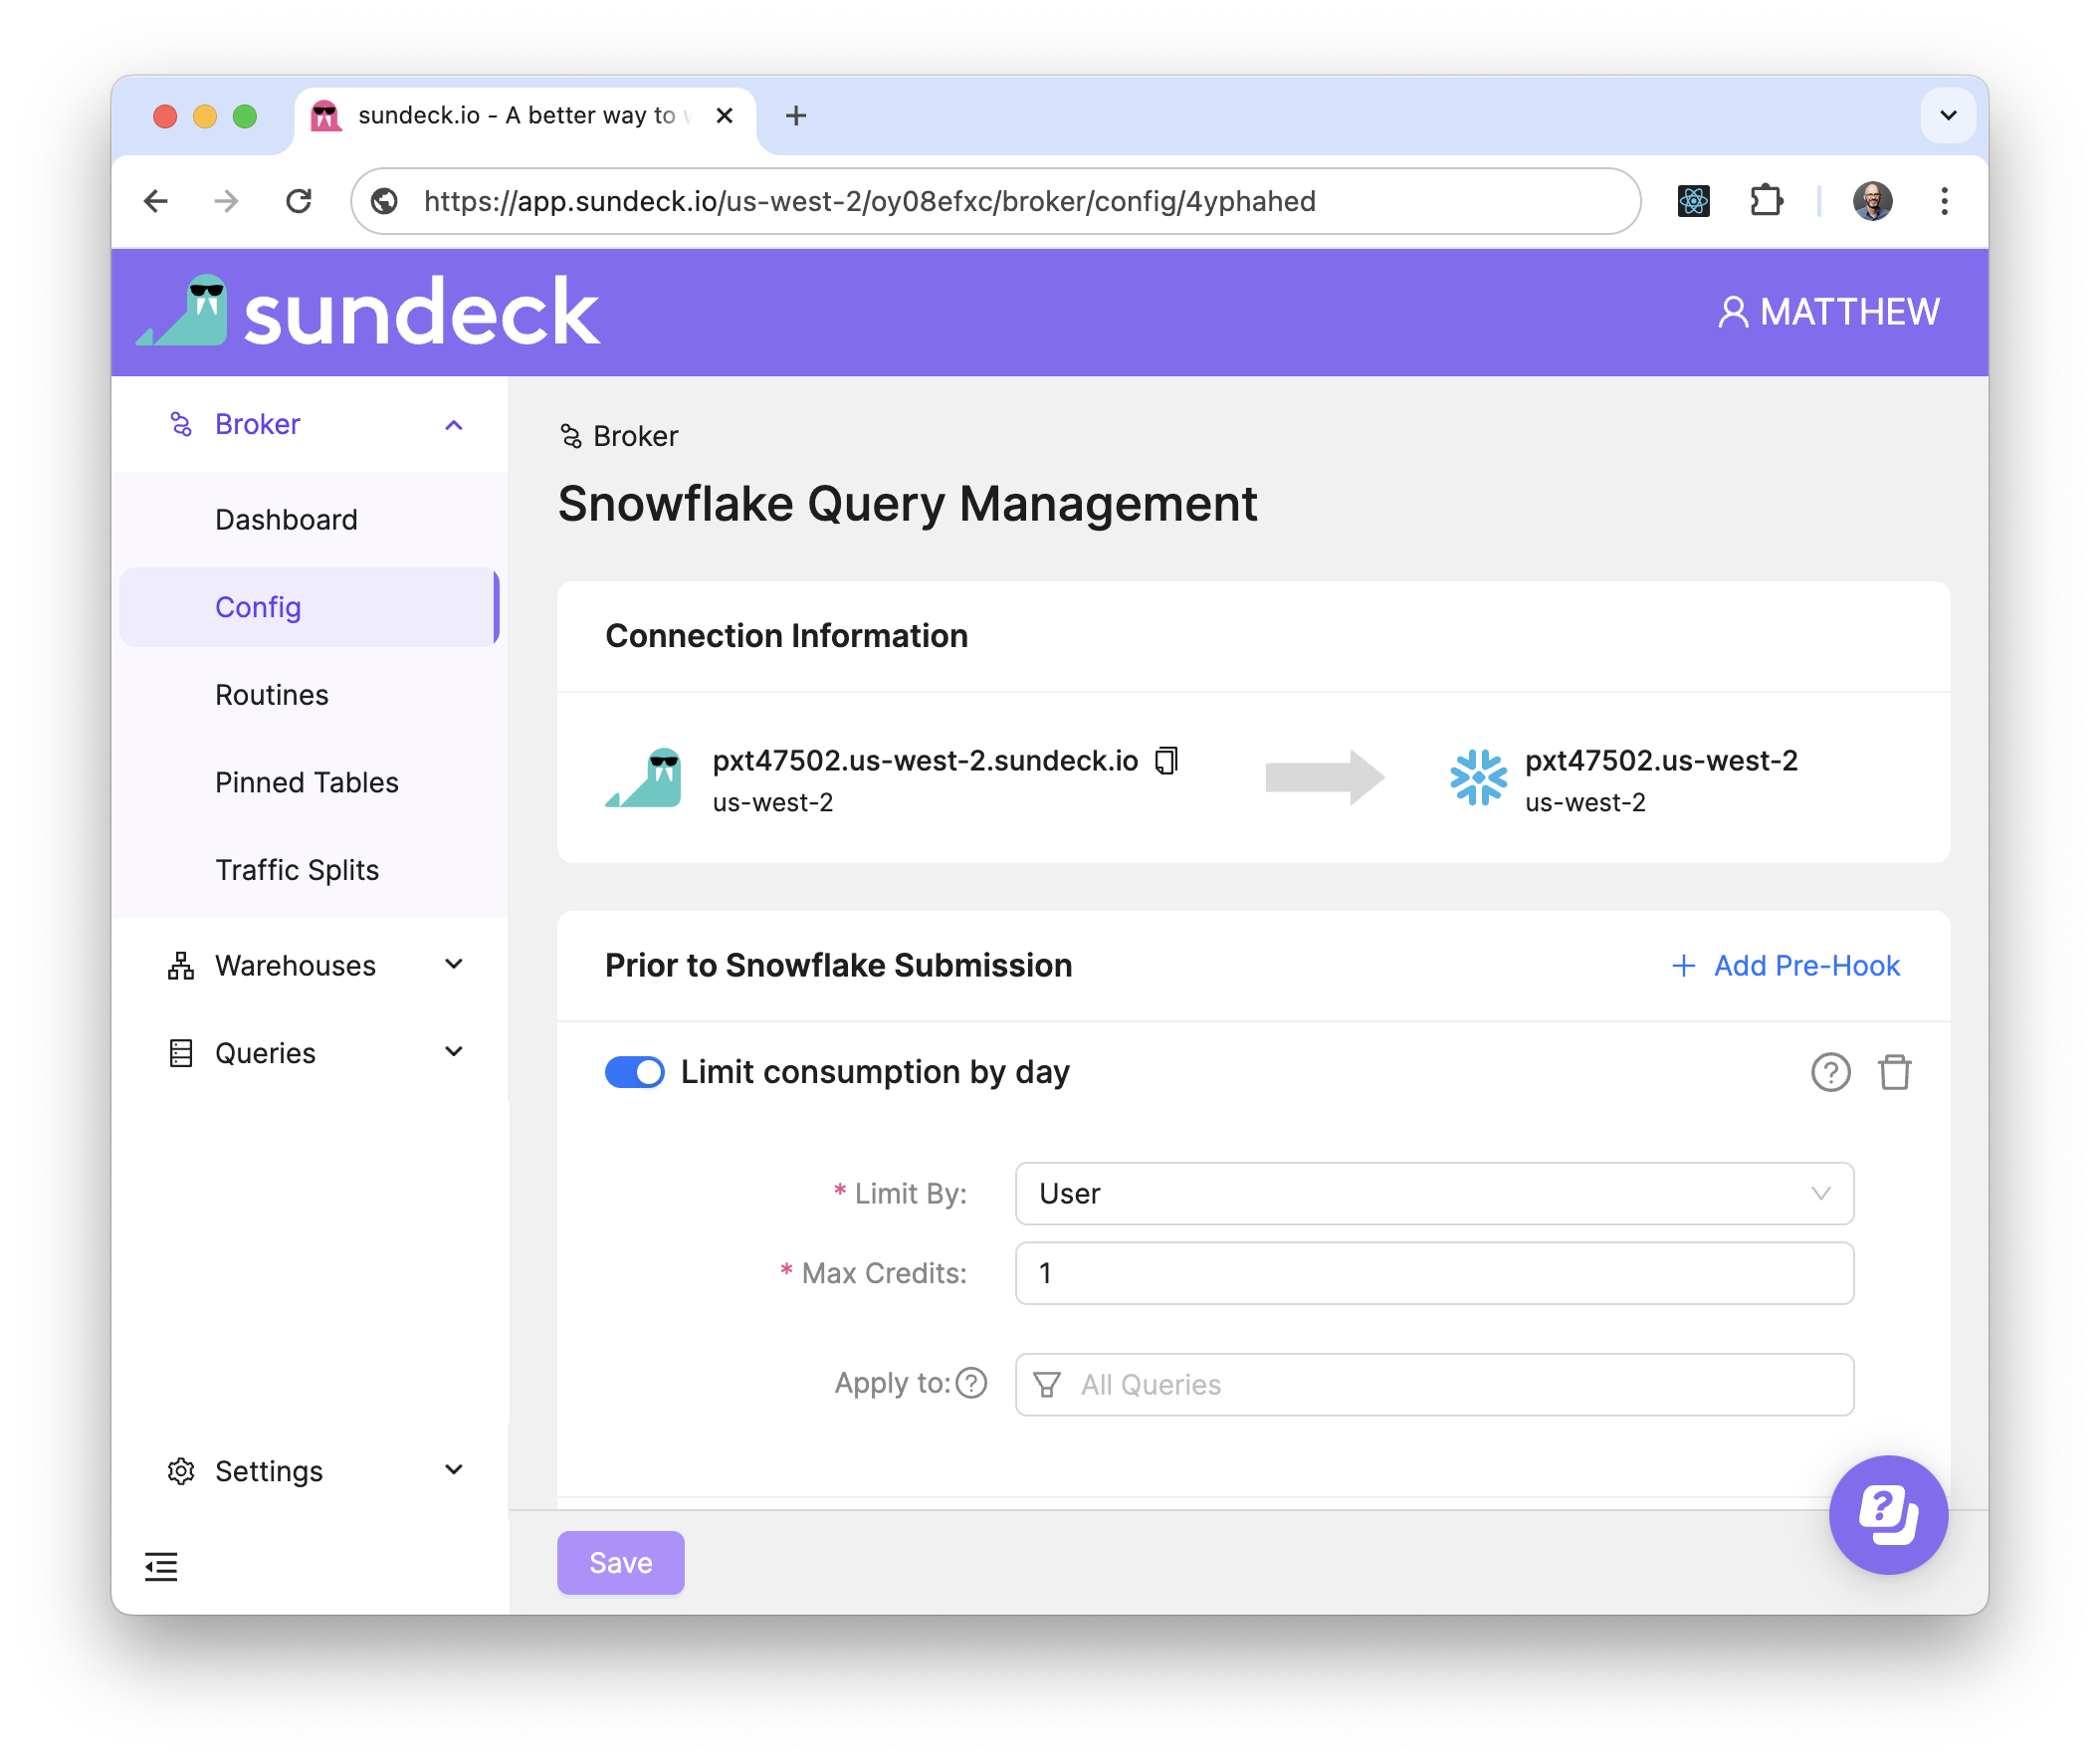
Copy the address of the Sundeck Broker. This can be done easily by using the “Copy to Clipboard” button next to the Sundeck Broker Hostname
Login to Sigma as a user with Admin privileges, and open the “Connections” page. This should be a visible as a link on the left-hand menu on the Home page. If “Connections” is not show at left, it can be accessed by clicking the “Administration” gear icon at the bottom-left of the Sigma UI
Once on the Connections page, we’ll want to either edit an existing connection, or create a new connection. The procedure is the same in both cases; in this example we will create a new connection
Click on the Create button. The “Add new connection” page is displayed
Name the connection, and choose “Snowflake” as the connection type. The Connection Credentials dialog will now be displayed on the lower half of the page. Turn “on” the slider for “Use Custom Host”. Turning this option “on” will allow the entry of a Sundeck Broker Hostname in the “Custom Host*” field, in place of the Snowflake account name
Paste this Sundeck Broker Hostname from the first step into the Sigma “Custom Host*” field. Also enter your Snowflake account locator, desired compute warehouse to use for this connection, username and password, and role
The remaining settings can be left as their default values. Click “Create” at the top right of the page:
The connection will be created, and the Connection details page will be displayed for this new connection.
You can verify that everything is working as expected, by clicking the “Browse Connection” button at the top of the Connections page. A tree of available database objects (governed by the Snowflake role supplied to the connection) will be displayed at left. You can also set Sigma permissions on the connection to users/groups within Sigma
That’s it! You’re now ready to start using Sundeck to enhance your Sigma experience on Snowflake!